 02. June 2026
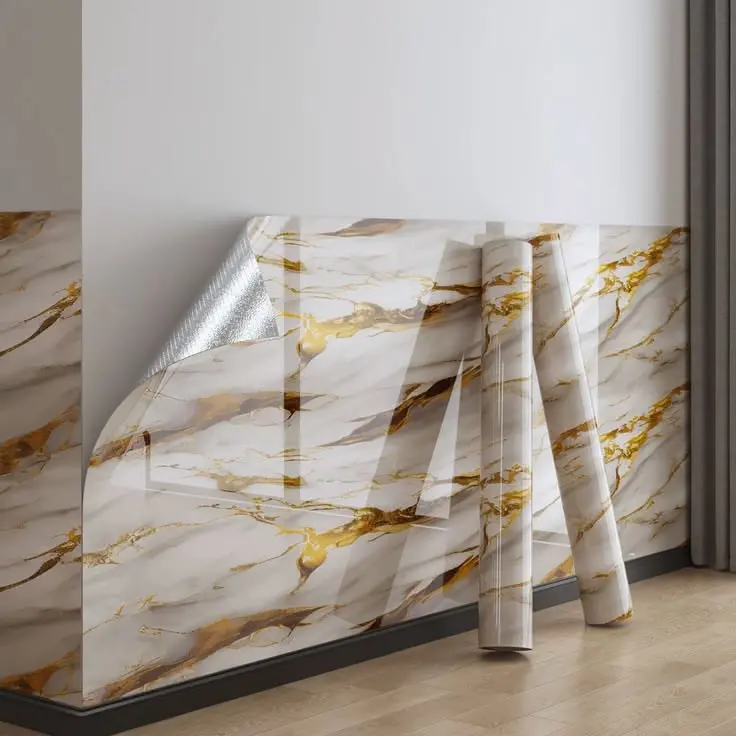
WALLPAPER INSTALLATION: STEP-BY-STEP GUIDE.
Wallpaper installation is still one of the best solutions for revamping your space without undertaking any drastic renovations. Wallpaper is an effective way to introduce pattern, texture, or color into a space, and knowing how to install it yourself can help you save money. While wallpapering requires some care, it is still easy enough for homeowners and tenants to handle. This article provides useful tips for wallpaper installation at home.
Tools and materials needed for wallpaper installation
Before you begin, get all necessary supplies for the wallpaper installation:
- Wallpaper rolls (allow extra for waste and pattern matching)
- Wallpaper adhesive or premixed paste
- Pasting table
- Paste brush or roller
- Spirit level or plumb bob
- Pencil
- Smoothing brush or wallpaper smoother
- Seam roller
- Sharp craft knife
- Spare blades
- Scissors
- Sponge and bucket of clean water
- Stepladder
- Measuring tape
Step 1: Preparation of the walls for wallpaper installation
Wall preparation is an essential step in the process of applying wallpaper. Wallpaper can mask minor imperfections, but larger flaws in the wall may become noticeable once the wallpaper is applied. Therefore, fill the holes and cracks with filler, sand the surface to make it even, and wipe all dust from the wall.
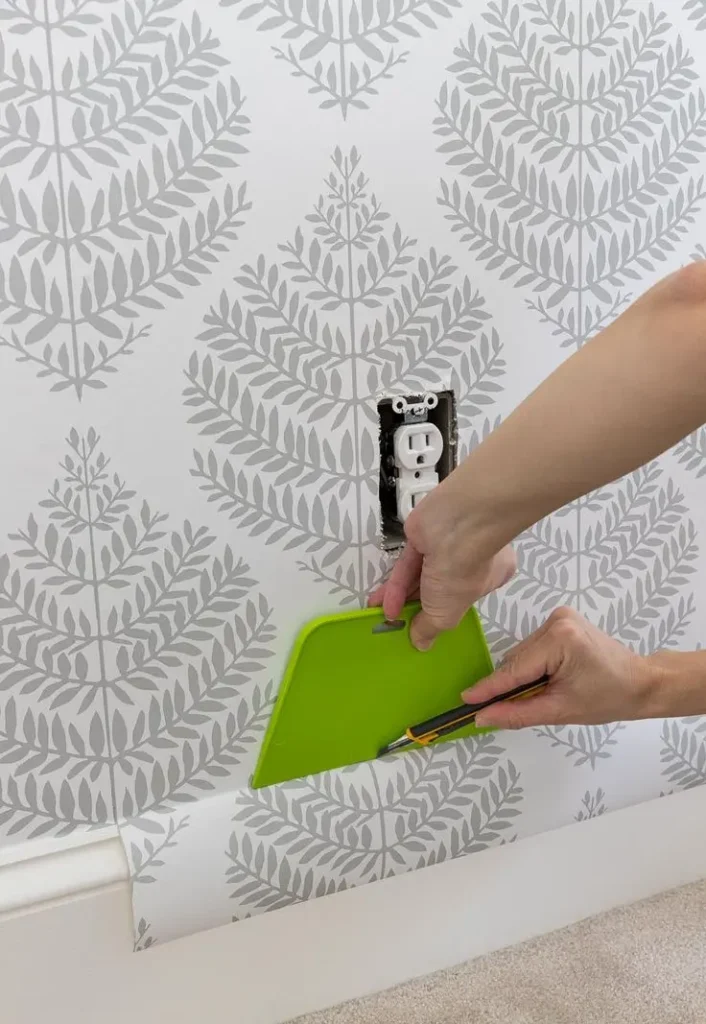
Firstly, turn off the electric current before beginning work. Wallpapering involves using water and adhesive around electrical outlets. It is also necessary to remove nails, screws, or hooks, and cover the outlets with masking tape. If it is the first time wallpaper is applied to a particular wall, apply a sizing coat to it. A sizing coat seals the wall surface so it does not absorb the wallpaper glue.
For rooms such as the bathroom and kitchen, select waterproof wallpaper. Wallpaper that has not been chosen based on this criterion can peel off within a relatively short period, regardless of how carefully it was done. Remove any previously attached wallpaper. If not, the wallpaper may bubble or start peeling in a short time.
Step 2: Mark a straight plumb line for accurate installation
As walls usually aren’t quite square, begin by making a vertical line as a guide. Measure one wallpaper width from the starting point, and from that point, using either a spirit level or plumb bob, make a line from the top of the wall to its bottom.
For patterned wallpaper, centre the design on the main focal point of the room, if one exists, such as a fireplace or window. If no focal point is present, begin from the most visible wall. Then position the final seam in a less visible area, such as behind a door or above a doorway.
Step 3: Measure, cut, and apply wallpaper glue
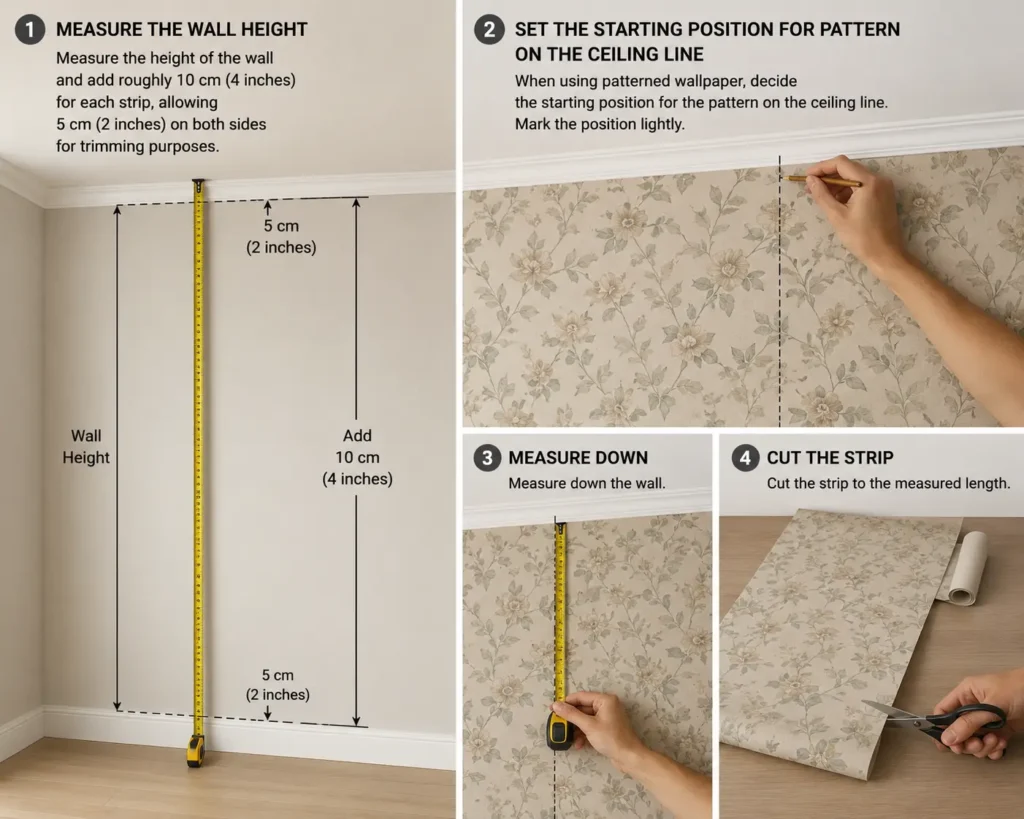
Measure the height of the wall and add roughly 10 cm (4 inches) for each strip, allowing 5 cm (2 inches) on both sides for trimming purposes. When using patterned wallpaper, decide the starting position for the pattern on the ceiling line, measure down and then cut the strip.
Apply the glue to the wall and not to the paper, as pasting it to the wallpaper makes it hard to handle and increases chances of tearing. Use the correct adhesive for your wallpaper to achieve the best results. If the wallpaper needs glue to be applied, fold it carefully with the pasted sides together and leave it for the time recommended by the manufacturer. Avoid making sharp folds, as these can damage the paper.
Step 4: Hang the first wallpaper strip correctly
Carefully unroll the top of the wallpaper first, not the whole strip at once. Match it with your plumb line, leaving about 5 cm overlap with the ceiling to trim off. Work out any air bubbles from the wallpaper by pressing it down using the smoothing brush in the direction from the centre towards the edges.
In case the strip becomes misaligned with the plumb line, adjust its position and add more paste on the wall underneath. Otherwise, putting wallpaper on a partially dried layer often causes bubble formation. If you use a wallpaper smoothing tool or a squeegee, work it from the centre to avoid air pocket formation. In case you are applying peel-and-stick type of wallpaper, do it in small strips, not all together.
Step 5: Match the pattern and install additional strips
Place the second strip adjacent to the first, making sure there is no overlapping and no gap showing. Seams should not be placed on the sides of doors and windows since the pressure in those areas is greater than in other places.
Clean off any glue left on the surface of the wallpaper by wiping it off with a wet sponge. If this step is ignored, dried glue could leave a mark behind that would be very hard to clean afterwards.
Step 6: Trim excess wallpaper and finish the edges
Excess wallpaper should be trimmed close to the ceiling and along the skirting boards with the help of a sharp craft knife and a straight edge. Blades should be changed frequently while working on the job. Otherwise, a dull blade might rip up the wallpaper, causing ragged cuts.
For cutting around corners, ensure that you overlap the corner by 2 cm. The strip must be smoothed over firmly, and then the adjoining strip is installed on the adjacent wall. One should never try to cut the wallpaper to fit tight around corners. It should be remembered that corners are rarely straight, and any attempt at wrapping may lead to problems.
Step 7: Drying process after wallpaper installation
Once the wallpaper installation is done, leave the wallpaper to dry on its own. Keep the room at regular temperatures for a minimum of 24 hours. Never try to get rid of any bubbles while the wallpaper is still wet. Most tiny bubbles vanish as the paper dries and sets in place.
Any remaining bubbles should be fixed by opening up a small cut and adding more adhesive. Never try to hurry the drying process using fans, heaters, or leaving the window open.
Conclusion
A well-installed wallpaper can transform a space for years to come. Taking the time to do wallpaper installation correctly helps ensure a neat finish, durability, and fewer maintenance issues in the future.
Sources