


Underfloor heating is a modern heating solution that warms a room from the floor upward, creating even heat distribution and improved comfort. With the availability of installation kits, many homeowners now DIY install underfloor heating systems. The process requires careful planning, proper insulation, and correct installation of heating elements to ensure safe and efficient performance.
Types of DIY Underfloor Heating Systems
Before installation, it is important to choose the right type of system:
1. Electric Underfloor Heating
This system uses heating cables or mats installed beneath the floor surface and connected to electricity. It is easier to install and commonly used in bathrooms, kitchens, or single rooms.
2. Water-Based (Hydronic) Underfloor Heating
This system circulates warm water through pipes beneath the floor and connects to a boiler or heat pump. It is suitable for heating larger areas or entire homes.
Step-by-step guide to installing a diy underfloor heating system
Here is how to install a diy underfloor heating system:
1. Plan the Heating Layout
Start by measuring the room and planning where the heating cables or pipes will run. Avoid placing heating elements beneath heavy appliances or fixed furniture, as these areas can restrict heat distribution.
2. Prepare the Subfloor
Ensure the floor surface is clean, dry, and level. Remove debris and old adhesives to create a smooth base for the heating system.
3. Install Insulation Boards
Lay insulation boards over the subfloor. These boards reduce heat loss and improve the efficiency of the heating system by directing warmth upward into the room.
4. Install the Thermostat and Floor Sensor
Mount the thermostat on the wall and place the floor sensor between the heating cables or pipes. The sensor monitors temperature and prevents overheating.
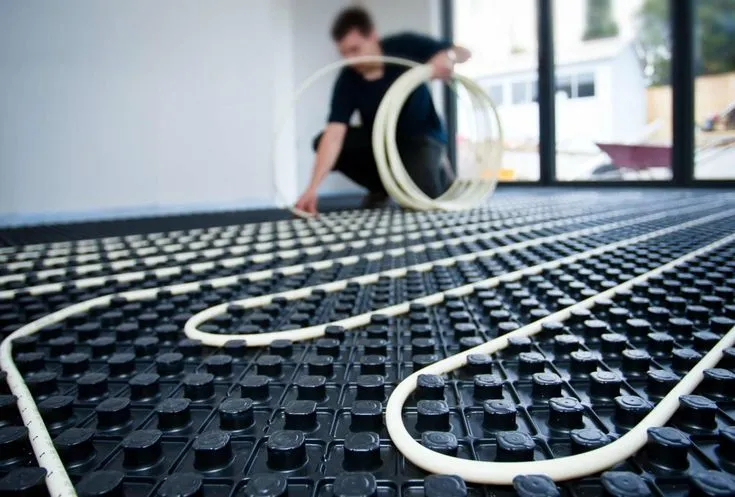
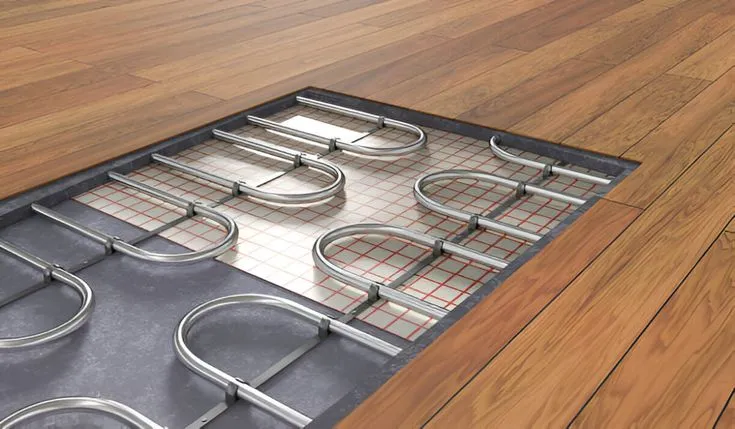
5. Lay the Heating Mats, Cables, or Pipes
Roll out the heating mat or lay the cables across the floor according to the planned layout. If using a water-based system, install the pipes in a serpentine or spiral pattern and connect them to the manifold. Ensure the cables or pipes do not overlap.
6. Test the Heating System
Before covering the system with flooring, test it to ensure everything works properly. For electric systems, check resistance with a multimeter. For water systems, perform a pressure test to detect leaks.
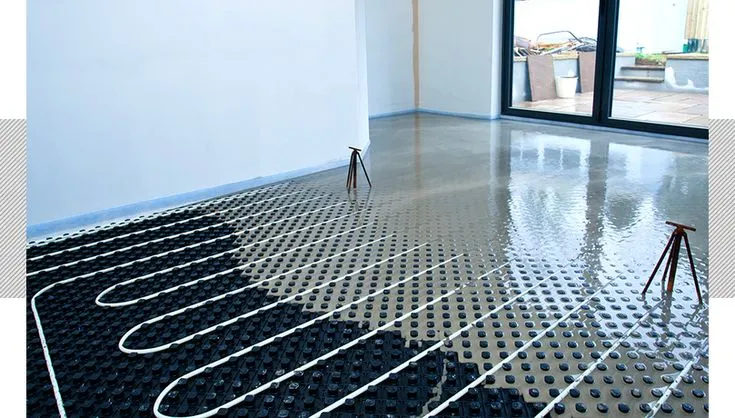
7. Install the Final Floor Covering
Once testing is complete, apply mortar, screed, or self-levelling compound over the heating elements and install the final floor finish. Materials such as tile, stone, or laminate are commonly used because they conduct heat efficiently. See how
Safety and Installation Tips
- Always follow the manufacturer’s installation instructions.
- Electrical connections should be completed by a qualified electrician.
- Test the system before installing the final floor to avoid hidden faults.
Conclusion
Installing a DIY underfloor heating system can significantly improve comfort and energy efficiency in a home.