


Wondering how to change a recessed light bulb, you’re not alone. Recessed or canned lights are a stylish and practical choice for many homes. They blend seamlessly with any décor and provide excellent lighting without taking up space. When the bulb burns out, replacing it can feel a little intimidating, especially if it’s your first time.
The good news is that with the right tools and guidance, changing a recessed light bulb is a straightforward and safe process. This guide will walk you through the process step by step, ensuring your lights shine again in no time.
Tools and Materials You’ll Need
Before you begin learning how to change a recessed light bulb, make sure you have the right tools.
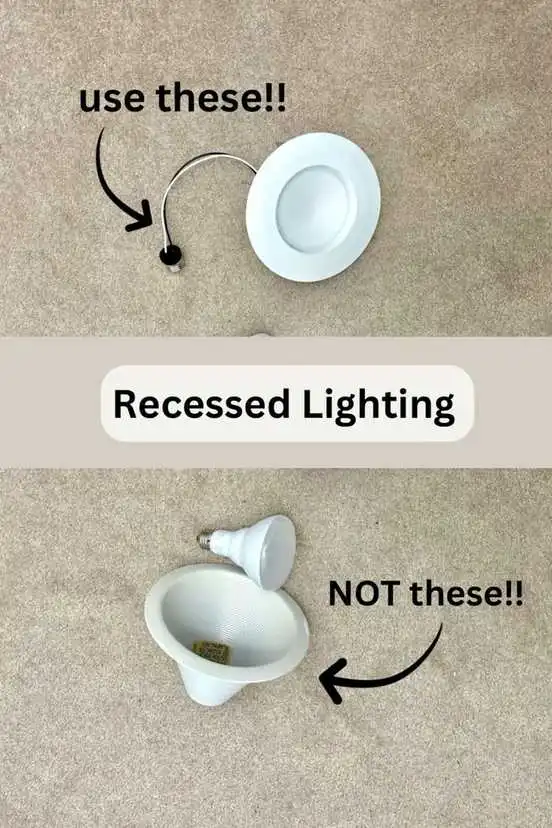
- light bulb: Choose one that matches the type, wattage, and size recommended for your fixture.
- Ladder or step stool: Ensure it’s sturdy and placed on a level surface.
- Screwdriver: May be needed if your trim is secured with screws.
- Gloves (optional): Protect your hands from heat and sharp edges.
- Safety glasses (optional): Prevent dust or debris from falling into your eyes.
Safety Precautions Before You Start
Electrical work, however minor, should always be approached with care. Take these steps first:
- Turn Off the Power: Locate your circuit breaker or fuse box and switch off the power to the recessed light you’ll be working on.
- Allow the Bulb to Cool: If the bulb was recently in use, give it time to cool before handling.
- Test for Voltage (Optional but Recommended): Insert a voltage tester into the socket. If it lights up, the power is still on. Double-check your breaker before proceeding.
Step-by-Step Guide: How to Change a Recessed Light Bulb
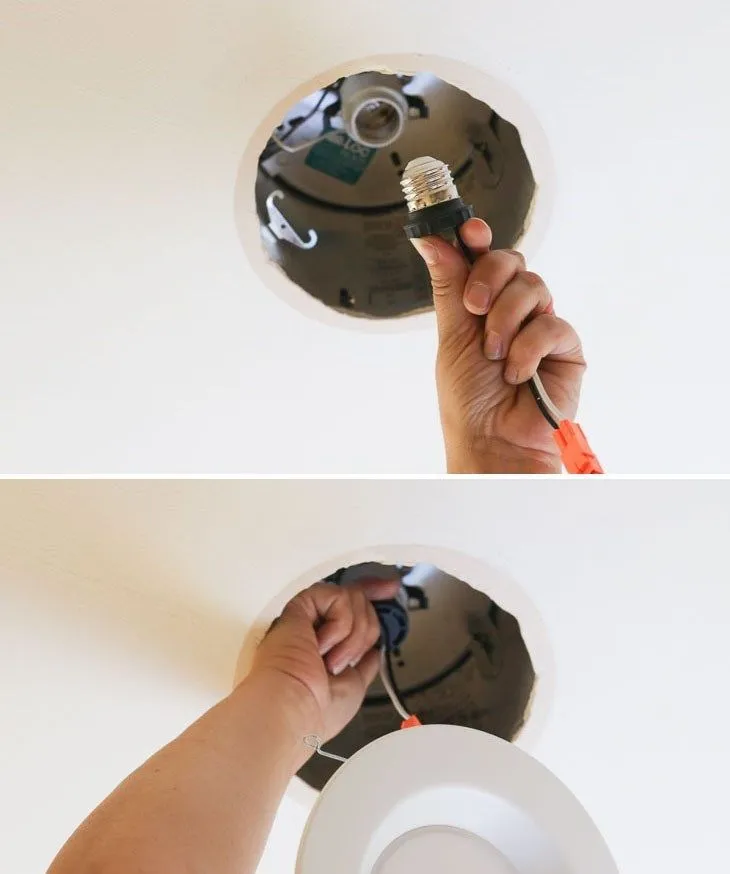
Step 1: Remove the Old Bulb
- Access the bulb by removing the trim if necessary.
- Check how the bulb is secured. Some bulbs use spring clips, while others use a twist-lock mechanism.
- For clips: gently press them inward to release the bulb.
- For twist-locks: turn the bulb counterclockwise until it loosens.
- Carefully pull out the old bulb without dropping it.
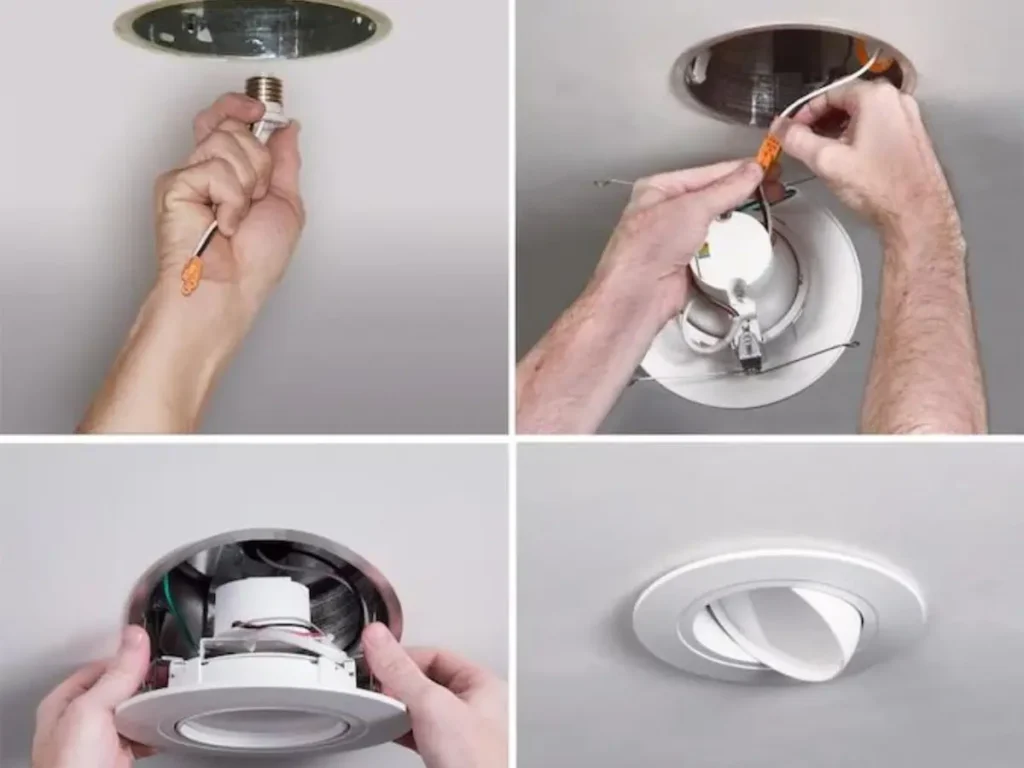
Step 2: Install the New Bulb
- Take your replacement bulb and align it with the socket.
- For twist-lock bulbs: insert and turn clockwise until secure.
- For clip-secured bulbs: gently press the clips apart and slide the bulb into place.
- Ensure the bulb fits snugly, but avoid overtightening, as this can damage the socket.
Step 3: Restore Power and Test
- Return to your breaker or fuse box and switch the power back on.
- Flip the wall switch to test your new bulb.
- If everything is working properly, your recessed light should shine brightly again.
Conclusion
Now that you know how to change a recessed light bulb, you can keep your home bright and safe without stress. With the right bulb, tools, and safety precautions, you can restore your lighting in just a few minutes.