

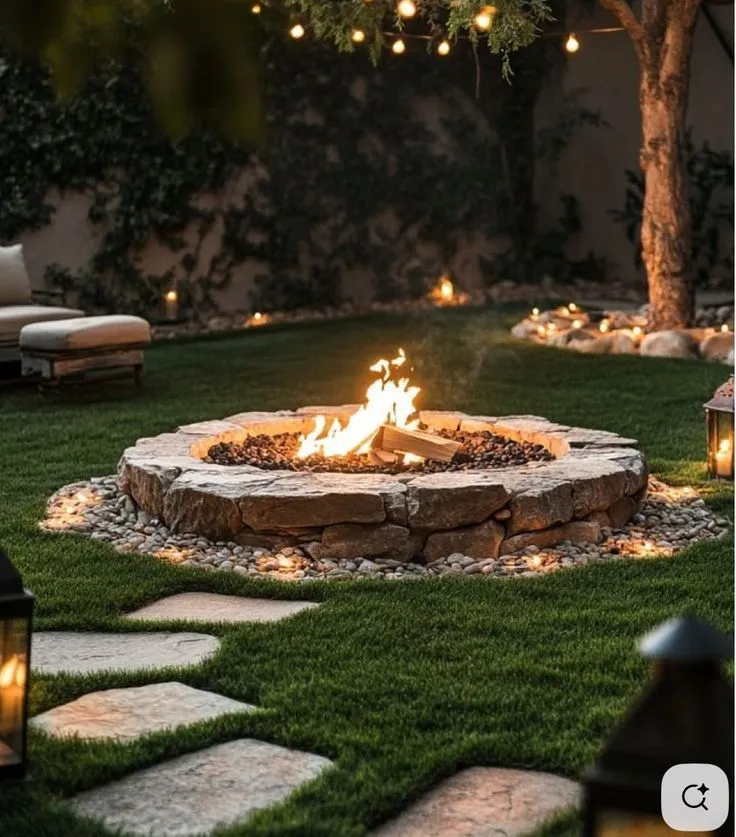

A DIY fire pit is a fantastic addition to any backyard, creating a cozy gathering spot while adding charm and functionality. With the proper materials and appropriate safety precautions in place, building your own fire pit can be a simple and manageable project. This guide walks you through the process step-by-step, focusing on safety, durability, and professional results.
Materials You’ll Need
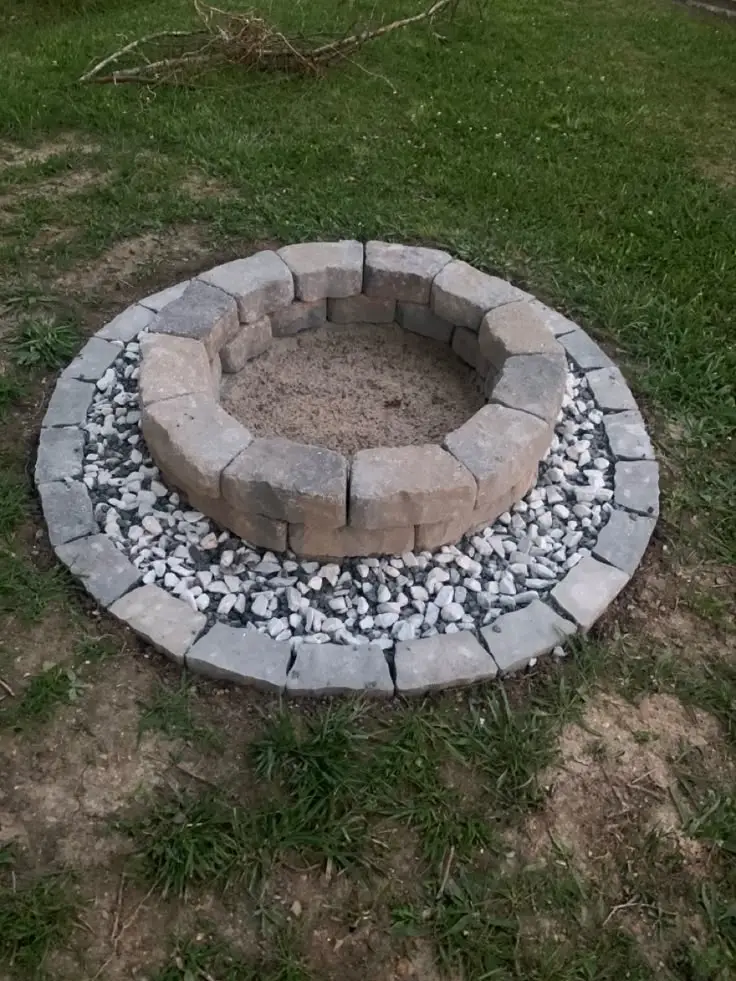
- Fire-Rated Bricks or Fire Pit Blocks: Use fire bricks rated for high heat, especially for the inner layer, to prevent cracking or hazards. Avoid standard retaining wall blocks near the fire.
- Fire Pit Ring or Steel Liner: Contains the fire safely. Ensure it fits snugly within your brick layout.
- Gravel: 2–3 inches for drainage.
- Sand: 2 inches for leveling and stability. Compact it before stacking bricks.
- High-Heat Masonry Adhesive or Refractory Mortar: Bonds bricks safely without breaking down under heat.
- Shovel, Level, Rubber Mallet, Tape Measure, and Stakes: Essential tools for digging, leveling, and assembling.
Step-by-Step Instructions
1. Select a Safe Location
Choose a flat, open area 10–15 feet away from buildings, trees, or other flammable materials. Avoid low-hanging branches directly above the pit. Safety comes first.
2. Mark the Fire Pit
Use a stake and string to outline your pit. A 36-inch diameter is standard, but you can adjust based on your space. Spray paint or sand the circle for a clear guide.
3. Dig the Base
Excavate about 6 inches inside the marked circle. Remove grass, roots, and debris to ensure a solid foundation.
4. Add Gravel and Sand
Pour 2–3 inches of gravel for drainage, then 2 inches of sand for leveling. Compact the sand layer with a tamper to prevent bricks from shifting.
5. Position the Fire Pit Ring
Place the steel fire ring in the center. Most DIY designs have bricks surrounding the ring for a secure, contained fire area. Ensure it’s level and centered.
6. Stack the Bricks
Start with fire-rated bricks around the ring. Use a rubber mallet to level each brick. Apply high-heat adhesive or refractory mortar between layers for stability. Continue stacking until you reach the desired height (usually 2–3 layers).
7. Check for Stability
Ensure all bricks are secure and the structure is level. Adjust as needed. Allow adhesive or mortar to cure fully according to the manufacturer’s instructions before using the fire pit.
Tips for Safe and Effective Use
- Always keep a fire extinguisher, bucket of sand, or water nearby.
- Avoid overloading the fire pit with wood. Maintain a manageable fire.
- Regularly remove ashes and debris to maintain airflow and reduce hazards.
- Consider adding seating or a perimeter of stones to keep guests safe and comfortable.
Conclusion
Building your own DIY fire pit is not only satisfying but also a practical addition to your outdoor space. By using fire-rated bricks, high-heat adhesive, and proper safety clearances, you ensure that your fire pit is both beautiful and safe for years of enjoyment.