


Accent walls are a great way to make your home design feel more cohesive and add visual dimension to rooms. An accent wall is a single wall in a room that’s intentionally designed to stand out from the others through unique paint colors, decorations, or textures, adding visual interest and personality to the space. To make a wall pop without overpowering the room. Let’s explore how you can easily create an accent wall. An easy example is a wood trim accent wall.
How Easy and Affordable Is It to Create an Accent Wall?
Creating an accent wall can be both easy and budget-friendly, especially when using materials like wood. A DIY wood accent wall brings visual interest and texture to any room with minimal investment and tools.
Here are other popular styles of accent walls to consider:
- Mural Accent Wall
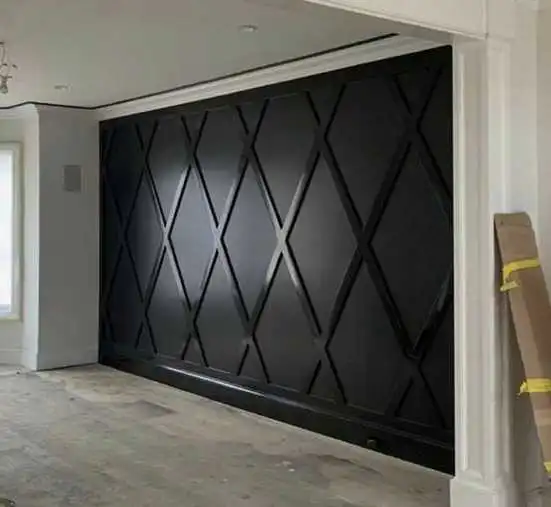
- Geometric Design
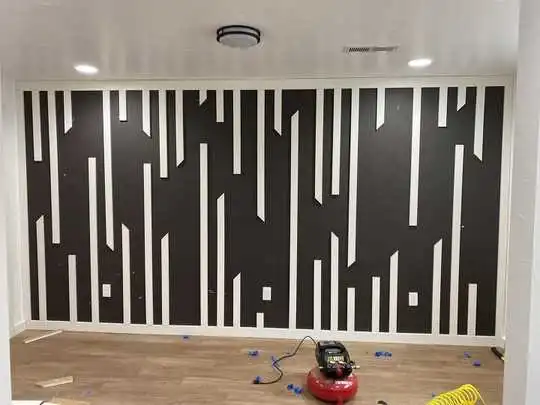
- Vertical or Horizontal Stripes
- Wall Paneling / Wainscoting
- Board and Batten
- Shiplap
- Tile Accent Wall
- Herringbone Pattern
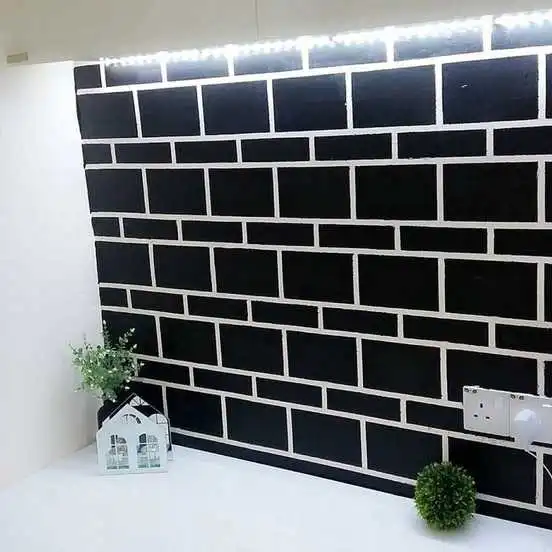
- Brick or Stone Veneer
- Gallery Wall
- Wall Decals
In this tutorial, we’ll focus on a simpler option: the wood trim (or plank) accent wall.
Materials Needed
- 1×2 boards (I used 1x2x8 ft)
- 2-inch finishing nails
- Caulk
- Spackling paste
- Painter’s tape
- 3-inch roller
- Angled paintbrush
- Wood primer
- Paint of your choice
Tools Needed
Step-by-Step Guide: How to Create a DIY Wood Accent Wall
1. Prep and Planning
Prep the wall by cleaning the surface to remove any dust, dirt that could affect adhesion. Then, use a stud finder to locate and mark the wall studs. This helps avoid driving nails into them unnecessarily, especially when laying out your design.
Determine your wall layout, and divide the wall into sections with measured spacing, avoiding the stud areas. Using a level, draw your lines and use painter’s tape to visualize the design.
2. Installing Vertical Boards
Begin framing the wall with vertical trim boards, ensuring each board is level before attaching it to the wall. Use the nail gun to secure the wood, holding the gun at an angle and alternating the direction of each nail (slanting left, then right). This technique gives the wood a better grip on the wall.
3. Adding the Herringbone Pattern
To add a herringbone design inside the framed sections:
- Use a digital angle finder or estimate with test cuts. Most herringbone designs require a 30° angle.
- Cut your angled pieces with a miter saw.
- Measure each section individually before cutting, as dimensions may vary slightly.
- You can either cut and attach each piece one section at a time or pre-cut all pieces and install them in batches, just keep them grouped to avoid confusion. Once completed, the herringbone pattern should fill the space beautifully.
4. Spackling and Caulking
This step is crucial for a clean, professional finish:
- Apply spackling paste where wood pieces join together to hide seams.
- Sand down excess paste after it dries to create a smooth surface.
- Apply caulk where the wood meets the wall and into any nail holes. This ensures a polished and seamless look after painting.
5. Priming and Painting
Use painter’s tape to protect edges and surrounding walls. If the wood isn’t pre-primed, apply a coat of primer using an angled brush. Let it dry completely. Next, paint the accent wall with two coats of your chosen color, allowing each coat to dry before the next. A small 3-inch roller works best for detailed areas. After final touch-ups, carefully remove the painter’s tape—tutorial video.
Conclusion
Your accent wall is now complete. Add furniture, decor, or artwork to bring the entire space together. DIY projects like this prove that you don’t need to spend a lot to make a big visual impact. I hope this guide helped make your accent wall project fun, easy, and successful! See articles on DIY projects.