SIMPLE WAYS TO PROTECT WALLS FROM DAMAGE.
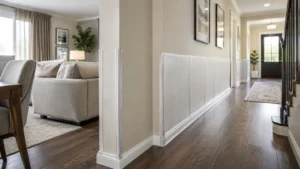
Walls are exposed to daily wear from furniture and moisture. Over time, these small incidents can lead to dents, scratches, and stains, leading to costly repairs. Fortunately, most wall damage is preventable with a few simple maintenance habits. Learn practical, low-cost ways to protect walls from scratches, dents, moisture, and daily wear with simple maintenance habits for homes and offices. Ways to protect walls from damage 1. Install corner guards on exposed edges Wall edges are especially vulnerable to bumps from furniture. Corner guards made from vinyl, rubber, or metal absorb impacts before they reach the wall. Many are available in clear or paintable finishes, making them easy to blend with your décor. 2. Use wall protection sheets or plastic film Wall protection sheets create a barrier against scratches, stains, and scuffs in busy areas. Temporary plastic film is ideal during painting, renovations, or construction and peels away easily when the work is complete. For long-term protection, PVC or acrylic wall panels work well in kitchens, hallways, and stairwells. 3. Fit kick plates along the base of walls The lower part of a wall often collects scuffs from shoes, carts, and other rolling objects. Kick plates made from metal or durable plastic protect this area from everyday wear, making them a practical addition to homes with children, bicycles, or heavy foot traffic. 4. Use furniture leg pads to prevent wall damage Attach felt pads to the legs of chairs, tables, and other furniture to reduce scratches and dents caused by movement. When arranging a room, leave a small gap between large furniture pieces and the wall to prevent repeated contact over time. 5. Address water leakages early Moisture can lead to peeling paint, stains, mold, and weakened wall surfaces. Repair plumbing leaks promptly, improve ventilation in kitchens and bathrooms, and use water-resistant paint or sealant in damp areas. If you notice water seepage, inspect the wall for cracks and address the underlying problem before repainting. 6. Wrap furniture corners before moving Moving furniture is one of the most common causes of wall damage. Wrap sharp furniture corners with foam, or split pool noodles before moving them through narrow doorways and staircases. Taking your time or using experienced movers can significantly reduce accidental damage. 7. Conduct routine cleaning to remove dirt Routine cleaning removes dirt and grime that can affect painted surfaces over time. Regular inspections also make it easier to spot small cracks, dents, or damp areas before they become more expensive repairs. When to call a professional Minor dents, scuffs, and small cracks can usually be repaired with filler and light sanding. However, expanding cracks, bulging walls, or recurring water stains may indicate structural or moisture-related problems. If these issues appear, consult a qualified contractor or structural engineer instead of covering them with paint. Conclusion Protecting walls doesn’t require expensive renovations. Simple measures such as corner guards, wall protection panels, furniture pads, and proper moisture control can prevent most everyday damage. Combined with regular cleaning and inspections, these practical steps help keep walls looking their best while reducing future repair costs. Sources